
From The Historic Huntsville Quarterly, Volume IV, No. 1, January-March 1978.
REPRINTED WITH THE KIND PERMISSION OF OLD HOUSE JOURNAL, 119 Berkley Pl., Brooklyn, N. Y. 11217. Subscriptions for this excellent publications are $12.00 per year.
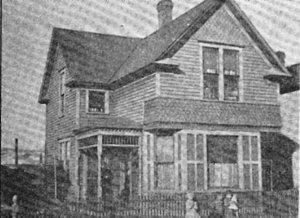
AFTER LIVING IN and running a Victorian restoration (museum) for five years, my husband and I decided to buy a piece of Victoriana for our own. The house we bought was covered with asbestos siding, the roof was shingle underneath with asbestos over it (and in need of repair) and the attractive old porch had been enclosed. However, we were fortunate in having a photograph of the house we purchased that had been taken at the turn of the century.
BEFORE BUYING THE HOUSE we gave the exterior a close look for signs that the lap siding was still there. We examined the window mouldings and found the asbestos to be flush with the mouldings and even protruding beyond the mouldings about 1/4 in. This was a good indication to us that the lap siding (clapboards) had been left intact and not stripped off previous to the asbestos addition. We also asked and received permission to remove a couple of the asbestos pieces to see what was underneath. We chose a spot on the front of the house where our old photo indicated that there were decorative shingles. We removed the brown asbestos and found the decorative shingles were there and seemingly in good shape.
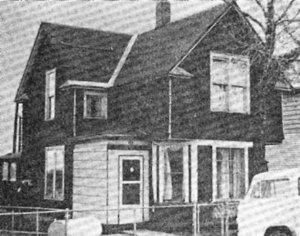
AFTER BUYING THE HOUSE we began interior restoration first, the inside was far worse than the exterior and that took a year of work. When the next summer rolled around we began the job of restoring the exterior. Using a crowbar and a hammer, my husband and I removed the asbestos from the house. We did not build or use scaffolding even though the house is some twenty-eight ft. from the ground in places. We did use an aluminum extension ladder forty ft. long that could be taken apart and used as two 20 ft. ladders. The mess from the asbestos was unbelievable. The yard was covered with bits and pieces of it as well as nails and it was my job to load the stuff onto the truck, haul it to the dump and unload it. Before we completed the removal I was on a first name basis with the dump superintendant. The last pieces of the mess were cleared by several rakings of the yard to get the small pieces and nails.
AFTER THE ASBESTOS was removed we took a good look at the house. There were five areas that had fared badly due to runoff from the roof. Some lap siding had to be replaced in these areas. We used redwood, and even though today's siding does not come in the exact same width as the original siding used on our house, we got the closest size to it and spaced them to match the old lineup as best we could. You could not tell from looking what was replaced.
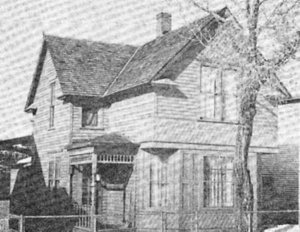
FOR THESE HEAVILY damaged areas we scraped the peeling paint and then sanded with hand-held sandpaper. tie were fortunate that there was no tar paper under the asbestos and there were only a few seams where the sealing compound had soaked through to the wood. We used a putty knife to scrape those areas and get the compound off. Most of the siding was in excellent shape as well as the paint on it. Vie found some of our decorative shingles were split or cracked. These we carefully pushed back together and nailed into place with small finishing nails. On the larger cracks we used plastic wood and then sanded it down to a smooth finish. We would not have been able to do this had there been extensive damage to the shingles as the plastic wood is pretty expensive and it is a tedious, time-consuming procedure.
FROM OUR PAINT SCRAPINGS we determined that the house had been shades of green, then yellows and brown. It had been a three color paint job originally, but we felt that two colors were all we could handle and we chose a dark blue trim and dark earthy gold for the main color to give the house a lot of color and warmth against the annual two hundred inches of snow we receive that is on the ground at least eight months of the year. We used Sherwin Williams latex and we did not use a base coat since the old paint job was in good shape for the most part and we did not use a primer on the new wood or scraped and sanded areas and so far we have had no problems with the paint. We did caulk seams and fill the nail holes from the asbestos siding with a latex caulking compound. And we washed the house before painting.
I BEGAN THE PAINTING while my husband started the roofing. Since we do live high in the mountains of Colorado (10,200 ft. elevation), we had problems that many parts of the country may not experience. Mainly it was the time factor. We could only count on nice weather from June 15 until the middle of September. And we could count on a rain shower just about every afternoon and night. The latex paint could not be applied unless it was 45 degrees outside. And, of course, painting in the rain is not advisable.
IN THE BEGINNING, I told my husband I would not climb the twenty ft. ladders but would only go up the eight to ten ft. wooden one we built. Before the job was completed I found myself not only going up the twenty ft. ladders but painting parts of the second floor from the porch rooftops while holding onto a rope attached to the chimney. With time against us, I couldn't have finished the job if I waited for the roofing project to be completed and the upper storey to be painted first.
THE ROOF ORIGINALLY had been wooden shingles and this had been covered with asbestos paper and asbestos shingles, depending on what had been done when. They were also different colors--one part of the roof was red, another part dark green.
RATHER THAN TAKE OFF the old roof and risk leaking on the interior restoration already completed (remember the daily showers) we decided to go with cedar shingles over the two roofs presently on the house.
FIRST, THE PLYWOOD DECKING was put down, then the felt, the valleys reinforced with metal for good snow and ice removal and last the cedar shingles were put on with common sixpenny nails rather than regular roofing nails to give them a good "bite" through the extra thickness. The pitch of the roof was steep enough to require a rope to work with to hold onto while nailing. A ladder hooked across the crown of the roof also made work a little easier. The roof was too steep to "sit" and toe boards were the most effective means of working. These were attached to the roof with metal strips.
WHEN THE ROOFING WAS COMPLETED, my husband joined me in the painting project and we began to attend to some of the problem areas. The cap mouldings over the windows and the mouldings under the eaves had been removed when the asbestos was put on. We were very fortunate to have the photo to show us what had been where.and one cap moulding had been left over the front second storey windows. With the picture to guide us and the example left, we set about to construct our own detail work for replacement.
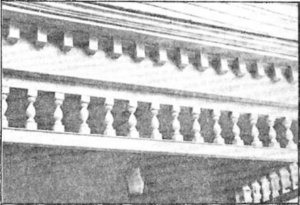
THE EAVE MOULDING was easy. We used a milled 2-1/2 in. door-window trim readily available at the lumber yard. We painted them gold to contrast with the blue and painted them before we put them up. We also painted the area they were to be placed on before we nailed them into place. Actually, I believe it is easier to replace these mouldings as we did and pre-paint them than it would be to paint existing mouldings already in place.
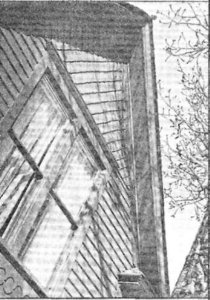
THE CAP MOULDINGS over the windows were not as easy. We used four pieces of lumber; one was a wide flat board approximately 5 in. in width, then nailed to the top of it is a piece of milled window or door framing (interior) approximately 3 in. in width, and placed a piece of cap wood on top. The fourth board was a piece of lath that we placed behind the assembled cap moulding to force it slightly forward from the wall. The cap mouldings were cut at 45 degree angles on each end. This gave them the same appearance as the old cap moulding. These, too, were constructed and painted before attaching them above the window.
AS USUAL WITH most old homes, the window sills were in need of repairs, some worse than others. All were sanded by hand, not machine, and we used a latex caulking compound where needed. At first, we had tried a new exterior spackling compound which had been recommended to us, but it separated from the wood and did not perform satisfactorily for us.
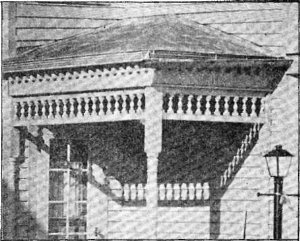
THE ORIGINAL SPINDLES were thinner in diameter than those on the market today, but we knew to be exact the spindles would have to be contracted for and such a specialty in our area is impossible to find. So, we used 6 in. spindles available in lumber yards and some discount stores. There were markings on the remaining support posts that showed us where the supportive wooden pieces had been and their size. We used IV' x 2h" strips of wood on top and bottom and placed the spindles 3 in. apart. We built two separate units, one for the front of the porch, the other for the side. We built each unit and painted it, then nailed it into place. The original porch did not have a handrail or spindles on the side, but was open instead.
THIS LEFT AN UNBALANCED look so we purchased a readymade handrail (available at lumber stores) and 28 in. height balusters and put in our handrail. There were other old houses around town that had similar rails original to their porches, so it was historically in keeping with our area to do this.
WE ADDED a post lantern in the front yard and a matching fixture for the porch. Time and wreather caught up with us and we were unable to remove the chain link fence in front and replace it with a woodari picket fence. This is our project for next summer along with getting a lawn in.
THE WORK WAS HARD and it took us the whole summer to accomplish. But we did it all ourselves with no previous experience to bring to the job and our 2-1/2 year old son was a part of the project as well. Children can be very useful when it comes to cleaning up the asbestos mess and even our toddler found it fun to load the truck. The feeling of pride and accomplishment is most rewarding at the end of the job and we felt our project was doubly successful when two other neighborhood homeowners painted the trim on their homes to make them stand out and give their houses contrast. Rarely a week goes by that someone doesn't stop and point and look at the house or photograph it. It has been a most rewarding experience and we join the ranks of homeowners who find the charm and history of an old house far outweigh the problems or inconvenience.
Kay Blair and her husband, Edward, are curators of the Healy House-Dexter Cabin. They had formerly lived in the museum where they came across the photo of their present house. When they went to find the house in the photo, they realized it was across the street—well disguised with asbestos. Since they have moved in and restored the house, they have added to their family with toddler, Darrell and a new baby girl, Rimery Kay.